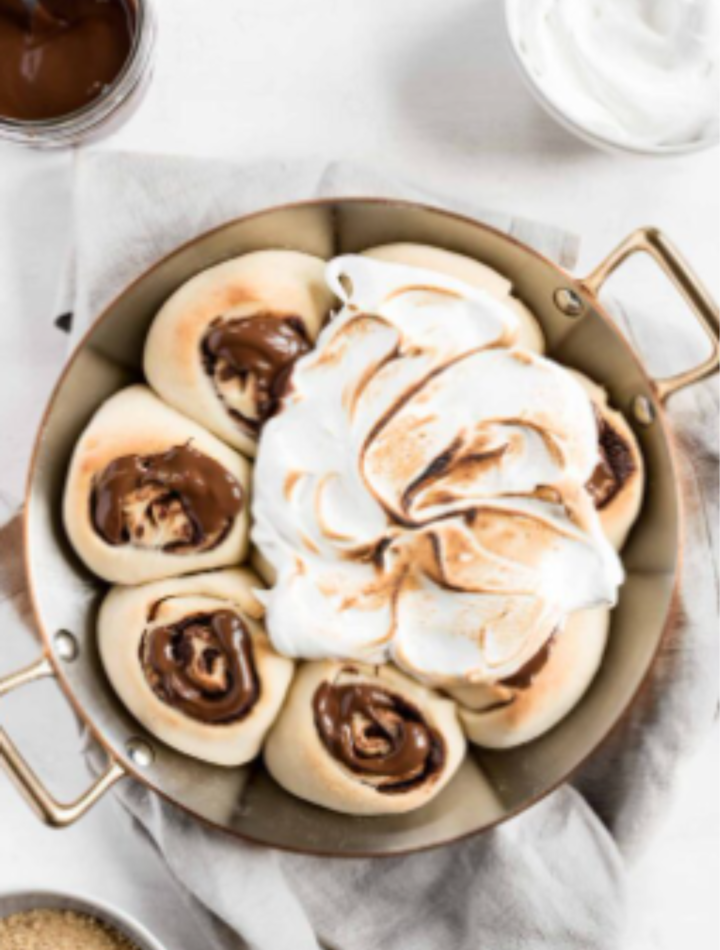
If you’re craving a quick dessert that delivers all the nostalgic flavors of a campfire s’more without the need for a fire pit, these Melt-In-Your-Mouth S’mores Roll-Ups are exactly what you need. Made with simple pantry ingredients and ready in about 10 minutes, this delightful treat combines gooey marshmallows, rich melted chocolate, and buttery golden bread rolled into irresistible bite-sized desserts.
Perfect for busy weeknights, after-school snacks, movie nights, parties, or last-minute sweet cravings, these s’mores roll-ups capture everything you love about traditional s’mores in a fun and easy-to-make format. The crispy exterior contrasts beautifully with the warm, melty filling, creating a dessert that both kids and adults will adore.
Why You’ll Love These S’mores Roll-Ups
Ready in just 10 minutes
Requires only a few ingredients
Kid-friendly and fun to make
No campfire needed
Perfect for parties and gatherings
Crispy on the outside, gooey on the inside
Easy to customize with different fillings
What Are S’mores Roll-Ups?
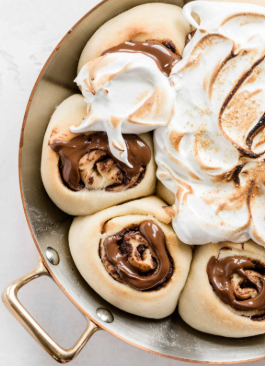
S’mores Roll-Ups are a creative twist on the classic American campfire dessert. Instead of graham crackers sandwiching chocolate and toasted marshmallows, the ingredients are wrapped inside flattened bread slices, rolled tightly, brushed with butter, and toasted until golden brown.
The result is a handheld dessert that delivers the same beloved flavors with even more melty goodness in every bite.
Ingredients
For 8 roll-ups:
8 slices soft white sandwich bread
8 large marshmallows or 16 mini marshmallows
1 cup milk chocolate chips
4 tablespoons unsalted butter, melted
2 tablespoons granulated sugar
1 teaspoon ground cinnamon (optional)
Optional Add-Ins
Peanut butter
Nutella
Caramel sauce
Crushed graham crackers
Mini chocolate bars
White chocolate chips
Strawberries or banana slices
Equipment Needed
Rolling pin
Non-stick skillet
Small bowl
Pastry brush
Spatula
Knife
Step 1: Prepare the Bread
Start by removing the crusts from each slice of bread.
Using a rolling pin, flatten each slice until it becomes thin and pliable.
Flattening helps the bread roll easily and creates a more compact dessert with a crispier texture after cooking.
Set the flattened slices aside.
Step 2: Prepare the Filling
Place a small amount of chocolate chips near one edge of each bread slice.
Add one large marshmallow or two mini marshmallows on top of the chocolate.
Be careful not to overfill the bread, as the filling will expand and melt during cooking.
If desired, add a small spoonful of peanut butter or Nutella for extra richness.
Step 3: Roll the Bread
Starting from the side with the filling, carefully roll the bread tightly into a log.
Press gently to secure the seam.
The marshmallow and chocolate should be completely enclosed inside the bread.
Repeat with all remaining slices.
Step 4: Prepare the Butter Mixture
In a small bowl, combine:
Melted butter
Sugar
Cinnamon (optional)
Mix until well combined.
This buttery coating helps create a beautifully golden exterior while adding extra flavor.
Step 5: Coat the Roll-Ups
Using a pastry brush, lightly coat each roll-up with the butter mixture.
Make sure all sides are covered.
The butter not only enhances flavor but also promotes even browning.
Step 6: Cook the Roll-Ups
Heat a non-stick skillet over medium heat.
Place the roll-ups seam-side down in the skillet.
Cook for approximately 2–3 minutes per side, turning frequently until all sides are golden brown and crispy.
As they cook, the chocolate melts and the marshmallows become soft and gooey.
The aroma alone will make it difficult to wait.
Step 7: Serve Immediately
Transfer the cooked roll-ups to a serving plate.
Allow them to cool for one or two minutes before serving.
The filling will be extremely hot immediately after cooking.
Serve warm for the best texture and flavor.
Delicious Serving Ideas
These roll-ups are wonderful on their own, but you can make them even more indulgent with a few simple additions.
Chocolate Drizzle
Melt extra chocolate and drizzle it over the roll-ups.
Powdered Sugar
Dust lightly with powdered sugar for a bakery-style presentation.
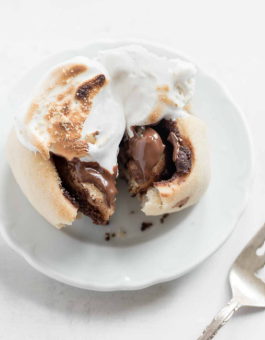
Ice Cream
Serve alongside vanilla ice cream for a decadent dessert experience.
Caramel Sauce
A drizzle of warm caramel adds incredible richness.
Whipped Cream
Fresh whipped cream provides a light and creamy contrast.
Tips for Perfect S’mores Roll-Ups
Use Fresh Bread
Soft, fresh bread rolls more easily and creates a better texture.
Avoid Overfilling
Too much filling can leak out during cooking.
Cook Over Medium Heat
High heat may burn the bread before the filling melts completely.
Seal the Edges Well
Rolling tightly helps keep the filling inside.
Serve Warm
The magic of this dessert comes from the gooey chocolate and marshmallow center.
Fun Variations
Peanut Butter S’mores Roll-Ups
Spread a thin layer of peanut butter inside before adding the chocolate and marshmallows.
Nutella S’mores Roll-Ups
Replace the chocolate chips with Nutella for an extra creamy filling.
Cookies and Cream Version
Add crushed chocolate sandwich cookies to the filling.
Banana S’mores Roll-Ups
Include thin banana slices for a delicious fruity twist.
Strawberry Chocolate Roll-Ups
Add diced strawberries along with the chocolate chips.
White Chocolate S’mores
Substitute white chocolate chips for a sweeter flavor profile.
Air Fryer Method
For an even easier preparation, cook the roll-ups in an air fryer.
Preheat the air fryer to 375°F (190°C).
Brush the roll-ups with butter.
Place them in a single layer.
Cook for 4–5 minutes until golden brown.
The air fryer creates an exceptionally crispy exterior while keeping the inside perfectly melted.
Oven Method
If you’re making a larger batch, the oven works beautifully.
Preheat the oven to 400°F (200°C).
Arrange roll-ups on a baking sheet.
Brush with butter.
Bake for 8–10 minutes, turning once halfway through.
This method is ideal for parties and family gatherings.
Storage Instructions
Although best enjoyed fresh, leftovers can be stored.
Place cooled roll-ups in an airtight container and refrigerate for up to 2 days.
Reheat in:
A skillet
Air fryer
Oven
Avoid microwaving if possible, as it may soften the crispy exterior.
Great Occasions for S’mores Roll-Ups
These easy treats are perfect for:
Movie nights
Birthday parties
Sleepovers
Family game nights
Holiday gatherings
Summer picnics
Quick weeknight desserts
Their simple preparation makes them ideal for involving children in the kitchen.
Why This Recipe Works
The secret lies in the combination of textures.
The bread becomes crisp and buttery on the outside, while the marshmallow melts into a soft, stretchy center. The chocolate turns rich and creamy, creating the iconic s’mores flavor everyone loves.
Unlike traditional s’mores, these roll-ups are less messy and easier to serve, making them a practical dessert for any occasion.
Nutritional Highlights
While definitely a treat, these roll-ups offer portion-controlled indulgence. Each roll-up delivers a satisfying balance of sweetness and richness without requiring a large list of ingredients or lengthy preparation.
Final Thoughts
These Melt-In-Your-Mouth S’mores Roll-Ups are proof that delicious desserts don’t need to be complicated. With just a handful of ingredients and about 10 minutes of your time, you can create a warm, gooey, crowd-pleasing dessert that captures all the magic of classic campfire s’mores.
Whether you’re satisfying a late-night sweet tooth, entertaining guests, or making a fun treat with kids, this recipe is guaranteed to bring smiles. Crispy, buttery, chocolaty, and marshmallow-filled, every bite delivers pure comfort and nostalgia.
Once you make these easy S’mores Roll-Ups, you’ll find yourself returning to this recipe again and again whenever a quick and irresistible dessert is needed. Enjoy!