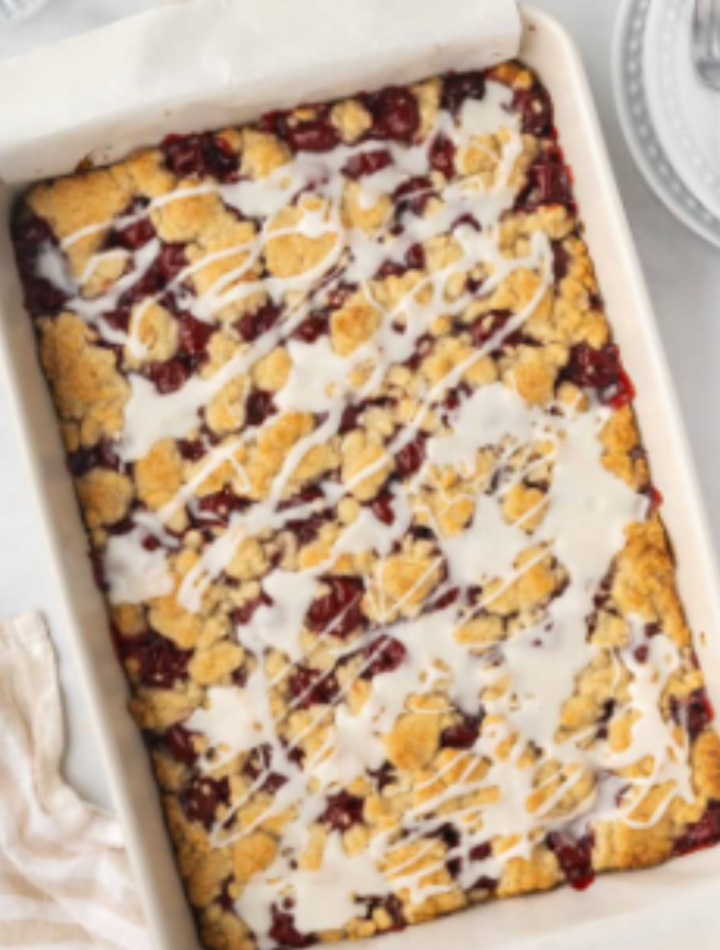
Cherry pie is a timeless favorite, but making a traditional pie from scratch can take time and patience. If you’re looking for a simpler way to enjoy those same sweet, fruity flavors, these Best Cherry Pie Bars are the perfect answer. They feature a buttery vanilla crust, a generous layer of juicy cherry filling, and a tender golden crumble topping finished with a sweet vanilla glaze. Every bite offers the comforting taste of homemade cherry pie in an easy-to-serve dessert bar.
These cherry pie bars are ideal for family gatherings, summer picnics, bake sales, holiday dessert tables, or whenever you’re craving a fruity treat. Since they’re baked in a single pan, they’re easier to prepare, slice, transport, and serve than a traditional pie. Whether you’re an experienced baker or just getting started, this recipe is simple enough for anyone to master.
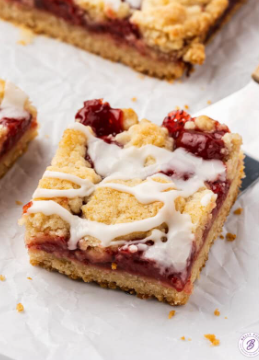
With just a handful of pantry staples and a can of cherry pie filling—or homemade filling if you prefer—you can create a dessert that’s both beautiful and delicious.
Why You’ll Love This Recipe
There are so many reasons these Cherry Pie Bars will become one of your favorite desserts:
Easy to make with simple ingredients
Perfect for beginner bakers
Rich buttery crust and crumble topping
Sweet and juicy cherry filling
Great for parties, holidays, and potlucks
Easy to slice and transport
Freezer-friendly
Delicious served warm or chilled
These bars combine everything you love about cherry pie with the convenience of a handheld dessert.
Ingredients
For the Crust and Crumble
1 cup (225 g) unsalted butter, softened
2 cups granulated sugar
4 large eggs
1 teaspoon vanilla extract
½ teaspoon almond extract (optional but recommended)
3 cups all-purpose flour
1 teaspoon baking powder
½ teaspoon salt
For the Filling
2 cans (21 ounces each) cherry pie filling
Or about 5 cups homemade cherry filling
For the Vanilla Glaze
1 cup powdered sugar
2 tablespoons milk
½ teaspoon vanilla extract
Optional Toppings
Powdered sugar
Sliced almonds
Fresh cherries
Whipped cream
Vanilla ice cream
White chocolate drizzle
Kitchen Equipment
You’ll need:
9×13-inch baking pan
Large mixing bowl
Electric mixer
Rubber spatula
Measuring cups and spoons
Cooling rack
Whisk
Step 1: Prepare the Pan
Preheat your oven to 350°F (175°C).
Grease a 9×13-inch baking pan with butter or line it with parchment paper, leaving an overhang on the sides. The parchment makes lifting and slicing the bars much easier once they have cooled.
Step 2: Make the Batter
In a large mixing bowl, beat the softened butter and granulated sugar together for 3–4 minutes until the mixture is pale and fluffy.
Add the eggs one at a time, beating well after each addition. Stir in the vanilla extract and almond extract.
In a separate bowl, whisk together the flour, baking powder, and salt.
Gradually add the dry ingredients to the butter mixture, mixing on low speed until just combined. Avoid overmixing, as this can make the bars less tender.
The batter will be thick and creamy.
Step 3: Create the Bottom Layer
Spread about two-thirds of the batter evenly into the prepared baking pan using an offset spatula or the back of a spoon.
Take your time to smooth the batter into all the corners for an even base.
Step 4: Add the Cherry Filling
Spoon the cherry pie filling evenly over the batter.
Spread it gently with a spatula, making sure the cherries are distributed across the entire pan.
The vibrant cherry layer is the star of this dessert, adding sweetness, color, and juicy flavor in every bite.
Step 5: Add the Crumble Topping
Drop spoonfuls of the remaining batter over the cherry filling.
It doesn’t need to completely cover the cherries. Leaving small gaps allows the beautiful red filling to peek through and creates a rustic appearance.
As the bars bake, the topping will puff up and turn beautifully golden.
Step 6: Bake
Bake for 40–45 minutes, or until:
The top is lightly golden brown.
The edges are set.
A toothpick inserted into the cake portions comes out clean.
If the top begins browning too quickly, loosely cover the pan with aluminum foil during the last 10 minutes of baking.
Remove from the oven and allow the bars to cool completely before glazing.
Step 7: Prepare the Vanilla Glaze
In a small bowl, whisk together:
Powdered sugar
Milk
Vanilla extract
Mix until smooth.
If the glaze is too thick, add a teaspoon of milk. If it’s too thin, add a little more powdered sugar.
Drizzle the glaze over the cooled cherry bars using a spoon or piping bag.
Allow the glaze to set for about 15 minutes before slicing.
Tips for Success
Use room-temperature butter and eggs for a smoother batter.
Don’t overmix after adding the flour.
Let the bars cool completely before cutting for clean slices.
Chill the bars for 30 minutes before slicing if you want extra neat edges.
Almond extract enhances the cherry flavor beautifully, but you can omit it if preferred.
Homemade Cherry Filling Option
If you’d like to make your own filling instead of using canned pie filling, combine:
5 cups pitted cherries
¾ cup sugar
2 tablespoons cornstarch
2 tablespoons lemon juice
¼ cup water
½ teaspoon almond extract
Cook everything in a saucepan over medium heat until the cherries soften and the mixture thickens. Let it cool before spreading over the batter.
Homemade filling gives the bars an even fresher flavor and lets you control the sweetness.
Delicious Variations
Cream Cheese Cherry Bars
Spread an 8-ounce layer of sweetened cream cheese over the crust before adding the cherry filling for a cheesecake-inspired twist.
Chocolate Cherry Bars
Sprinkle mini chocolate chips over the cherry layer before adding the remaining batter.
Mixed Berry Bars
Replace half the cherries with blueberries or raspberries for a colorful mixed berry dessert.
Lemon Cherry Bars
Add the zest of one lemon to the batter and finish with a lemon glaze instead of vanilla.
Nutty Cherry Bars
Mix chopped pecans or sliced almonds into the crumble topping for extra crunch.
Storage Instructions
Store the bars in an airtight container:
At room temperature: up to 2 days
In the refrigerator: up to 5 days
Because of the fruit filling, refrigeration is recommended if you plan to keep them for more than a day.
Serve chilled or bring to room temperature before enjoying.
Can You Freeze Cherry Pie Bars?
Yes! These bars freeze beautifully.
Wrap individual slices tightly in plastic wrap and place them in a freezer-safe container or zip-top bag.
Freeze for up to 3 months.
Thaw overnight in the refrigerator or at room temperature for about an hour before serving.
For the freshest taste, glaze the bars after thawing rather than before freezing.
Serving Suggestions
Cherry Pie Bars are delicious on their own, but they’re even better with:
Vanilla ice cream
Fresh whipped cream
Hot coffee
Black tea
Iced latte
Fresh cherries
White chocolate drizzle
Toasted almonds
They’re perfect for birthdays, holiday buffets, bridal showers, baby showers, summer cookouts, or cozy weekends at home.
Approximate Nutrition (Per Bar)
Based on 16 servings:
Calories: 340
Protein: 4 g
Fat: 14 g
Carbohydrates: 51 g
Fiber: 1 g
Sugar: 34 g
Sodium: 150 mg
Nutritional values may vary depending on the ingredients used.
Frequently Asked Questions
Can I use fresh cherries?
Absolutely. Fresh cherries work wonderfully when cooked into a homemade filling. Sweet cherries produce a milder dessert, while tart cherries create a more classic pie flavor.
Can I make these bars ahead of time?
Yes. In fact, the flavors develop even more after a few hours. Bake them a day in advance, cool completely, glaze, and store them in the refrigerator until ready to serve.
Can I use frozen cherries?
Yes. Thaw and drain them first, then cook them with sugar and cornstarch to make a thick filling before using.
Why are my bars crumbly?
Using too much flour or overbaking can dry out the bars. Measure your flour carefully and remove the pan from the oven as soon as the top is golden and set.
Can I double the recipe?
Yes. Double all ingredients and bake in two 9×13-inch pans, or use a larger sheet pan if available. Adjust the baking time slightly and check for doneness with a toothpick.
Final Thoughts
These Best Cherry Pie Bars deliver everything you love about traditional cherry pie in a simple, crowd-friendly dessert. The buttery crust, juicy cherry filling, tender crumble topping, and sweet vanilla glaze come together to create bars that are rich, flavorful, and incredibly satisfying.
Whether you’re preparing them for a holiday celebration, a family picnic, a bake sale, or simply to enjoy with a cup of coffee, these easy cherry pie bars are guaranteed to impress. They’re easy to customize, store well, and freeze beautifully, making them a reliable recipe you’ll turn to again and again. One bite of these fruity, buttery bars is sure to earn them a permanent place in your dessert collection.