Carmelitas Recipe
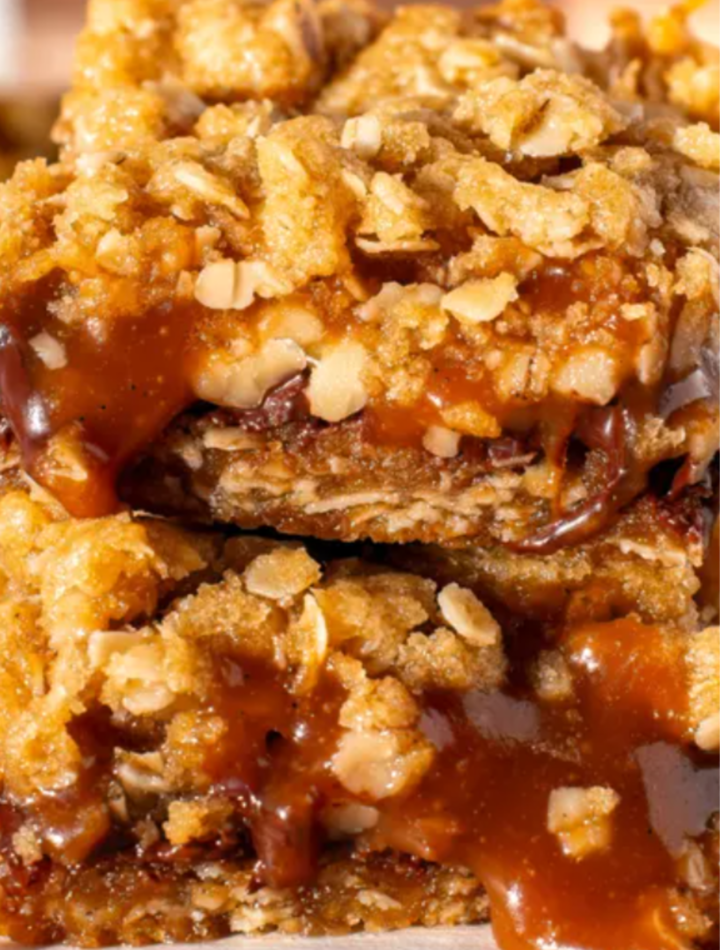
Few dessert bars are as comforting and irresistible as homemade Carmelitas. These gooey layered bars combine buttery oats, rich chocolate, and silky caramel into a dessert that feels both rustic and indulgent. Carmelitas are especially loved because they strike the perfect balance between chewy cookie bars and decadent candy-like treats. Whether you are baking for a family gathering, holiday tray, bake sale, or simply satisfying a sweet craving at home, these bars are guaranteed to disappear quickly.
The beauty of Carmelitas lies in their layers. A soft oat crust forms the base, followed by melted chocolate and creamy caramel sauce, then topped with another layer of oat crumble. Once baked, the caramel becomes rich and stretchy while the chocolate melts into pockets of sweetness. Every bite offers texture, flavor, and warmth.
Why You’ll Love This Recipe
This recipe is easy enough for beginner bakers yet impressive enough for special occasions. The ingredients are simple pantry staples, and the preparation requires no fancy equipment. Carmelitas can also be customized with nuts, dark chocolate, sea salt, or even peanut butter chips.
These bars are:
- Soft and chewy
- Rich and buttery
- Filled with gooey caramel
- Perfect for freezing
- Great for parties and gifting
- Delicious warm or chilled
Ingredients
For the Oat Crust and Topping
- 1 cup unsalted butter, melted
- 1 cup brown sugar, packed
- 1 teaspoon vanilla extract
- 1 1/2 cups all-purpose flour
- 1 1/2 cups rolled oats
- 1 teaspoon baking soda
- 1/2 teaspoon salt
For the Filling
- 1 package soft caramel candies (about 11 ounces)
- 1/3 cup heavy cream or evaporated milk
- 1 1/2 cups semi-sweet chocolate chips
Optional additions:
- 1/2 cup chopped pecans or walnuts
- Flaky sea salt for topping
- Dark chocolate chunks for extra richness
Kitchen Equipment Needed
- 9×13-inch baking pan
- Mixing bowls
- Wooden spoon or spatula
- Saucepan
- Measuring cups and spoons
- Parchment paper (optional but helpful)
Step 1: Prepare the Baking Pan
Begin by preheating your oven to 350°F (175°C). Grease a 9×13-inch baking dish lightly with butter or nonstick spray. For easier removal, line the pan with parchment paper, leaving some overhang on the sides.
Preparing the pan properly helps prevent sticking and allows the caramel bars to lift out cleanly after cooling.
Step 2: Make the Oat Mixture
In a large mixing bowl, combine the melted butter, brown sugar, and vanilla extract. Stir until smooth and glossy.
Add the flour, rolled oats, baking soda, and salt. Mix until everything is evenly combined. The texture should resemble a thick cookie dough mixed with crumble topping.
The oats are what make Carmelitas unique. They provide chewiness and a hearty texture that balances the sweetness of the caramel and chocolate.
Step 3: Create the Bottom Layer
Press about half of the oat mixture into the prepared baking pan. Use a spatula or clean hands to spread it evenly into the corners.
Bake this layer for about 10 minutes. Pre-baking helps create a stable crust that can support the caramel filling without becoming soggy.
When the crust comes out of the oven, it should look lightly golden but not fully baked.
Step 4: Melt the Caramel
While the crust is baking, prepare the caramel filling.
Place the unwrapped caramel candies and heavy cream into a saucepan over low heat. Stir continuously until the caramel is fully melted and smooth. This process may take about 5 to 7 minutes.
Be patient and keep the heat low. High heat can scorch the caramel and make it grainy.
Once melted, remove the caramel from the heat and set aside briefly.
Step 5: Add Chocolate and Caramel Layers
Sprinkle the chocolate chips evenly over the warm crust. The warmth from the crust will begin to soften the chocolate slightly.
Slowly pour the melted caramel over the chocolate chips. Use a spoon or spatula to spread it gently across the surface.
If using nuts, sprinkle them over the caramel layer now.
The combination of melted chocolate and flowing caramel creates the signature gooey center that makes Carmelitas unforgettable.
Step 6: Add the Crumble Topping
Take the remaining oat mixture and crumble it evenly over the caramel layer. Do not press it down firmly. Leaving it loose creates a crumbly golden topping after baking.
The caramel may peek through in some places, which is perfectly fine.
For an extra gourmet touch, sprinkle a little flaky sea salt on top before baking.
Step 7: Bake the Carmelitas
Return the pan to the oven and bake for 15 to 20 minutes, or until the top is lightly golden brown.
Do not overbake. The center may still seem soft when removed from the oven, but it will continue to set as it cools.
The aroma at this stage is incredible—warm butter, toasted oats, caramel, and chocolate filling the kitchen.
Step 8: Cool Completely
This is one of the hardest parts of the recipe because the bars smell amazing, but patience is essential.
Allow the Carmelitas to cool completely in the pan before slicing. This can take 2 to 3 hours at room temperature. For faster results, place the cooled pan in the refrigerator for about 1 hour.
Cooling helps the caramel firm up enough for clean slices while still remaining deliciously gooey.
Step 9: Slice and Serve
Lift the bars out using the parchment paper overhang if you used it. Cut into squares or rectangles using a sharp knife.
For neat slices, wipe the knife clean between cuts.
Serve the bars at room temperature for the perfect chewy texture, or warm them slightly for extra gooey caramel.
Tips for Perfect Carmelitas
Use Soft Caramels
Soft caramel candies melt more smoothly than hard caramels. Avoid overly tough caramel candies because they may become chewy rather than creamy after baking.
Don’t Skip the Oats
Rolled oats provide structure and texture. Quick oats can work in a pinch, but old-fashioned rolled oats give the best results.
Chill Before Cutting
If your bars seem too soft, refrigerate them before slicing. Chilled Carmelitas hold their shape beautifully.
Add Sea Salt
A sprinkle of sea salt enhances the caramel flavor and balances the sweetness perfectly.
Delicious Variations
Dark Chocolate Carmelitas
Use dark chocolate chunks instead of semi-sweet chips for a richer, deeper flavor.
Nutty Carmelitas
Add chopped pecans, walnuts, or almonds for crunch and extra flavor.
Peanut Butter Carmelitas
Mix peanut butter chips with chocolate chips for a sweet-and-salty variation.
Espresso Carmelitas
Add 1 teaspoon instant espresso powder to the oat mixture for subtle coffee flavor that pairs wonderfully with chocolate and caramel.
Storage Instructions
Store Carmelitas in an airtight container at room temperature for up to 4 days.
For longer storage, refrigerate them for up to 1 week.
These bars also freeze beautifully. Wrap individual pieces in plastic wrap and place them in a freezer-safe container for up to 3 months. Thaw at room temperature before serving.
Serving Ideas
Carmelitas pair wonderfully with:
- Vanilla ice cream
- Hot coffee
- Cold milk
- Caramel latte
- Fresh berries
You can also warm a bar slightly in the microwave and serve it with ice cream for an easy dessert that feels restaurant-worthy.
Final Thoughts
Homemade Carmelitas are the kind of dessert that instantly creates comfort and happiness. Their chewy oat layers, melted chocolate, and luscious caramel center make them impossible to resist. They are rustic enough for casual family desserts yet rich enough for celebrations and holidays.
One of the best things about Carmelitas is how nostalgic they feel. They taste like something lovingly baked in a cozy kitchen and shared with family and friends. Every bite brings together sweetness, warmth, and texture in a truly satisfying way.
Whether you enjoy them fresh from the oven, chilled from the refrigerator, or slightly warmed with ice cream, these caramel-filled bars are guaranteed to become a favorite recipe in your kitchen.